GitHub Pages gives every user a site at <username>.github.io. Ghost publishes a blog at a custom domain you choose. Shopify puts every new store at <store>.myshopify.com. All three share a problem: every hostname needs its own SSL certificate, issued automatically whenever a new user signs up.
With Potions' multi-tenant mode, it's taken care of for you. A single Phoenix app can serve unlimited tenant hostnames, each with fully automatic HTTPS, and you never have to set anything up per domain.
To see how it works I built a (tiny) example website builder, multi_tenant_example. In it, users pick a username and immediately get a live site at <username>.potionshop.xyz. They can also use their own domain.
The source is at github.com/potionsio/multi_tenant_example, so you can follow along to see exactly how a multi-tenant app is deployed on Potions.
Two kinds of tenant domains
Tenants can get a hostname in two ways. Each needs a different kind of certificate:
-
Subdomains of a domain you own (for example
moonbrew.potionshop.xyz). Because you control the parent domain, a single wildcard certificate can cover every subdomain at once. -
Custom domains the tenant owns (for example
thepotion.shop). You don't control these ahead of time, so each gets its own certificate, which is minted the first time someone visits.
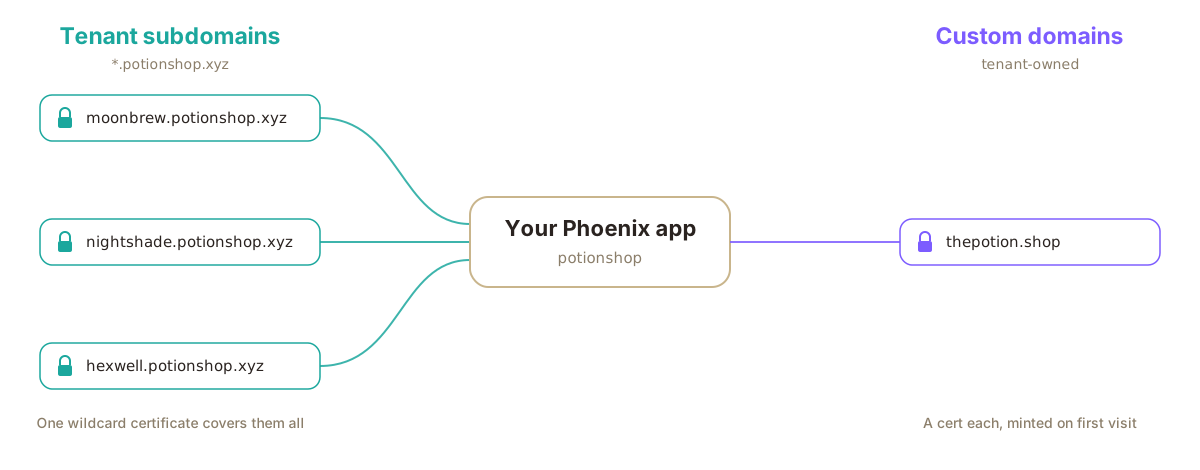
Multi-tenant mode gives you both, and it's flexible: you can start with subdomains and switch on custom domains later without touching the subdomains that are already running.
Subdomains that just work
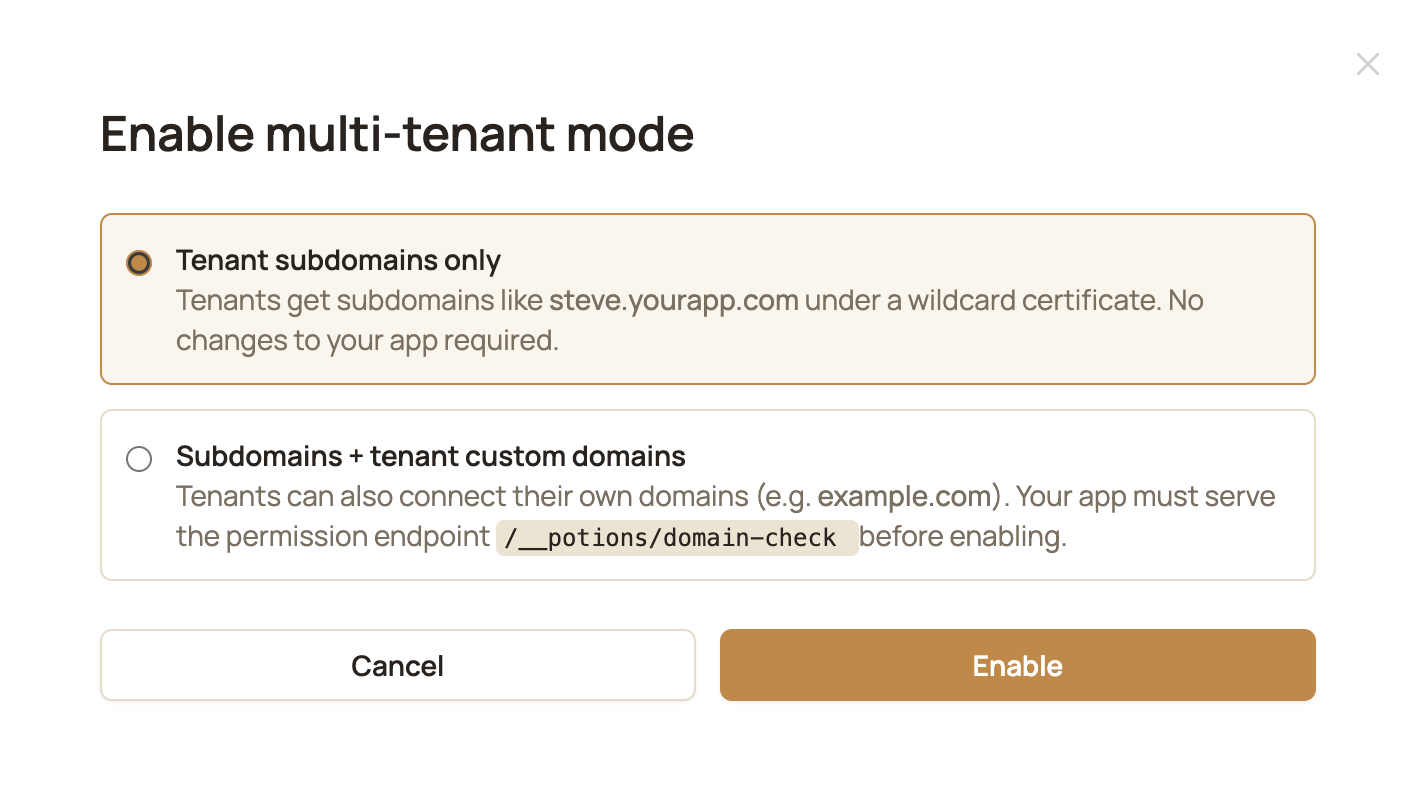
Enabling multi-tenant subdomains is easy. From your app's Domains tab, find the Multi-tenant mode card, click Enable, and choose Tenant subdomains only.
Then click Add Wildcard Domain and enter your wildcard. In this example I used *.potionshop.xyz. Once added, Potions gives you two DNS records to create at your DNS host.
- A wildcard A record pointing at your server.
-
A one-time
_acme-challengeCNAME.
Add both and then click Verify DNS.
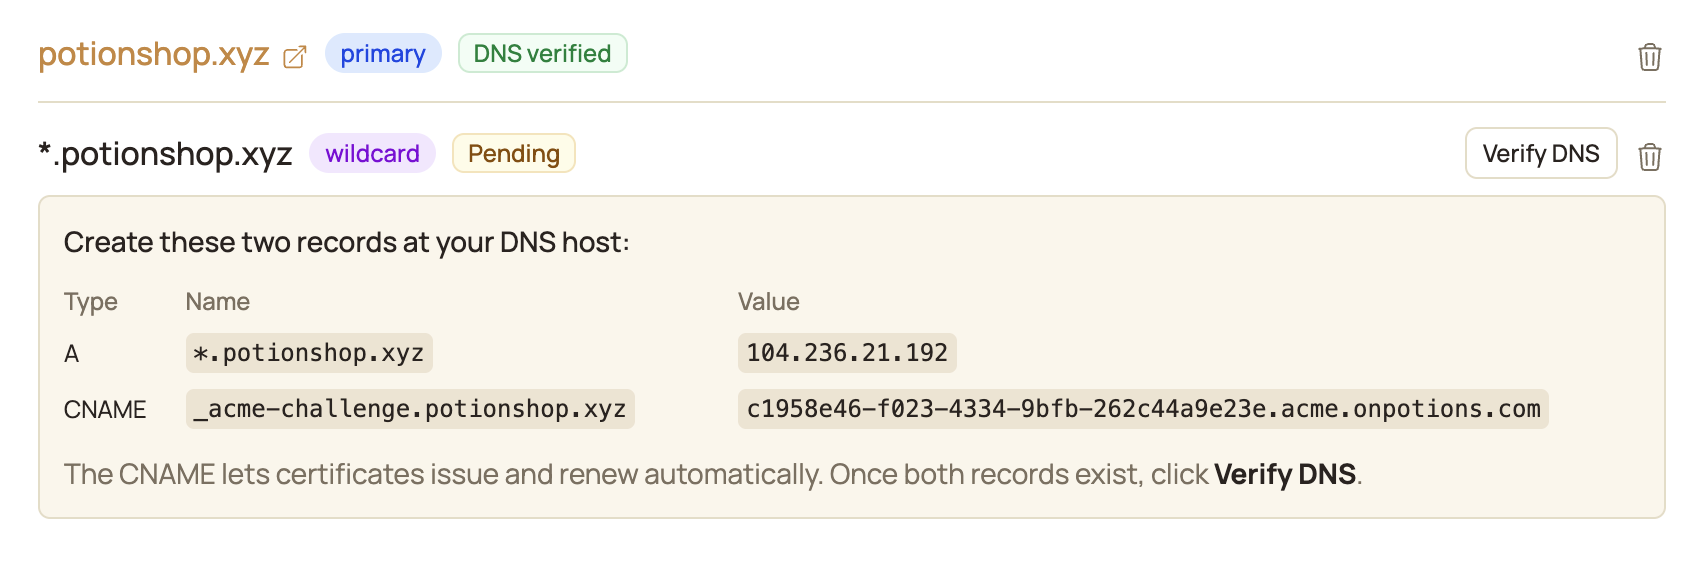
And that's it. Now every subdomain will work instantly and your users will get a valid certificate.
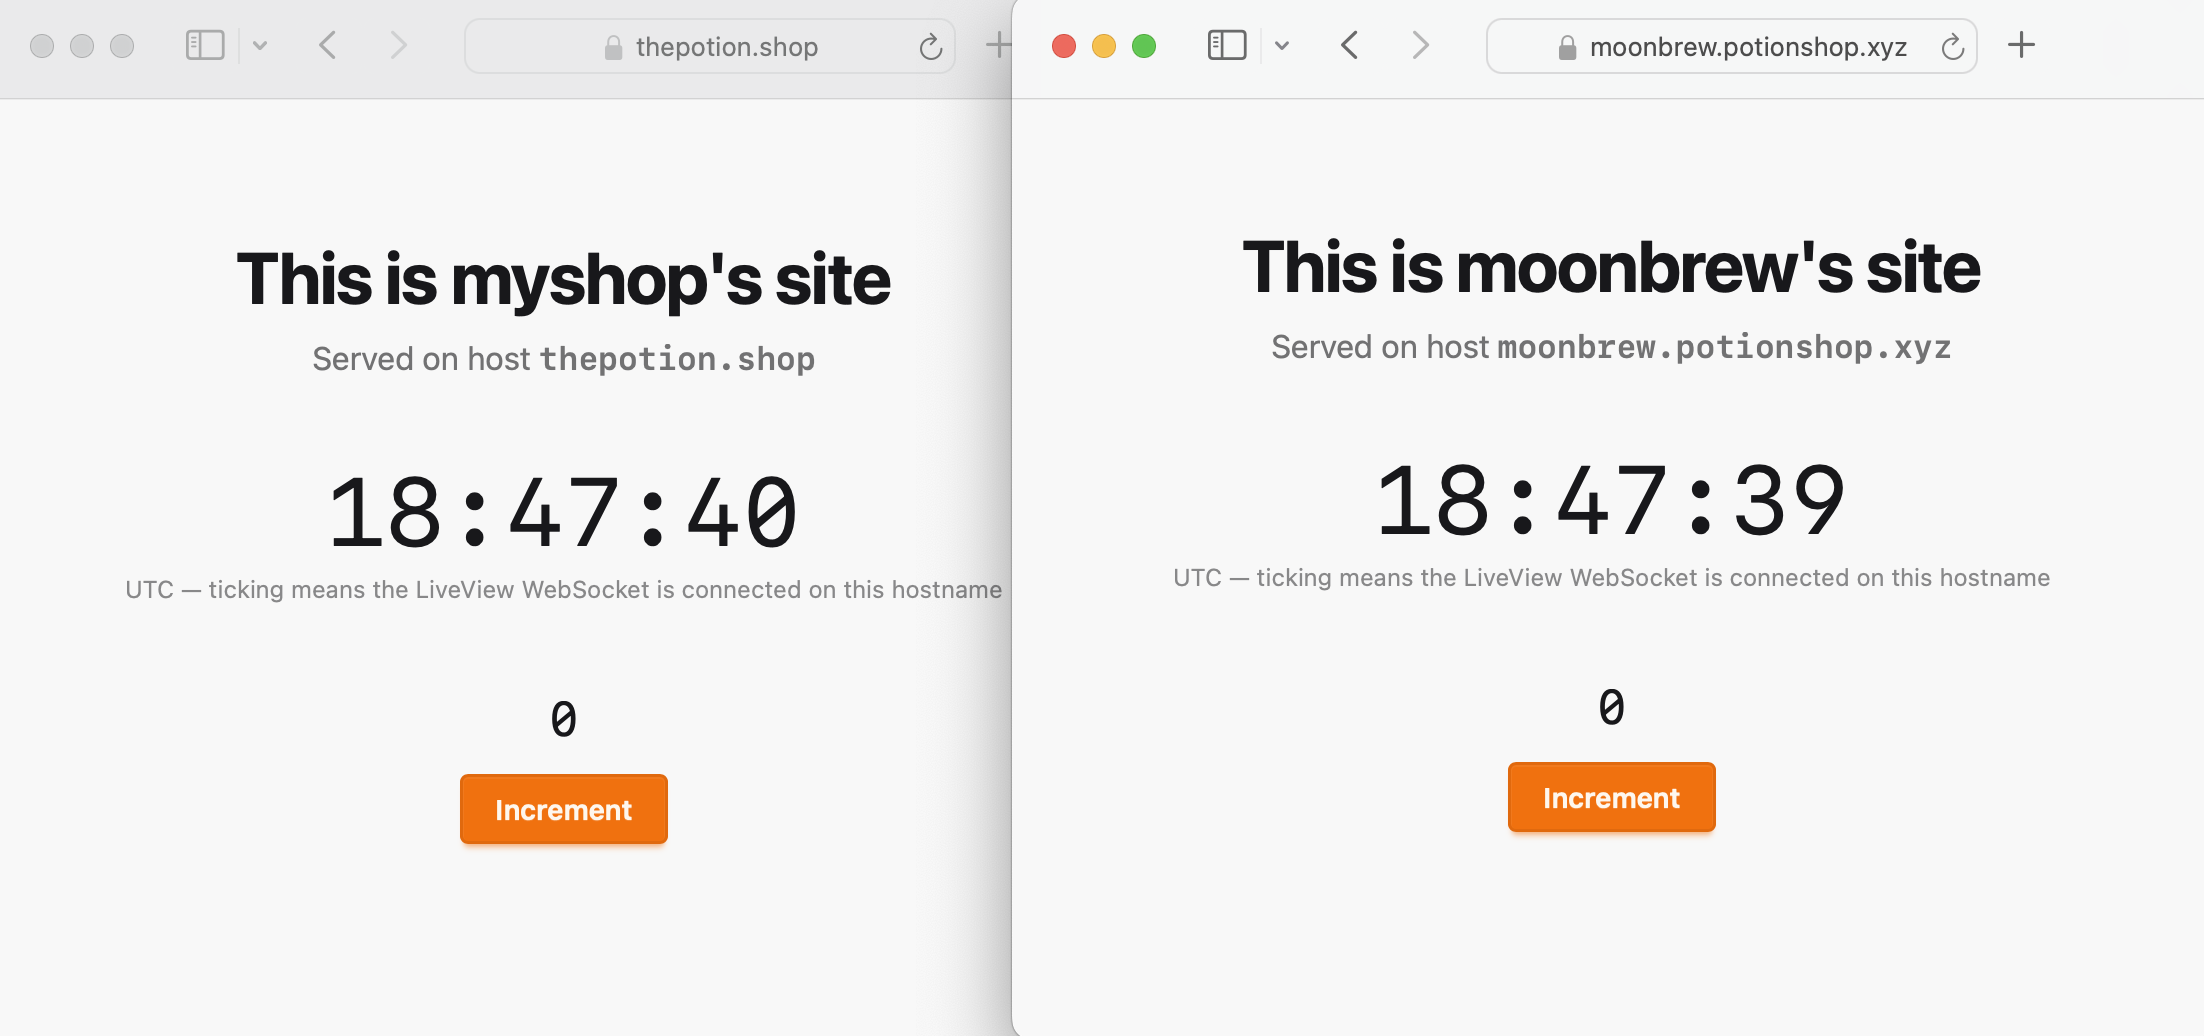
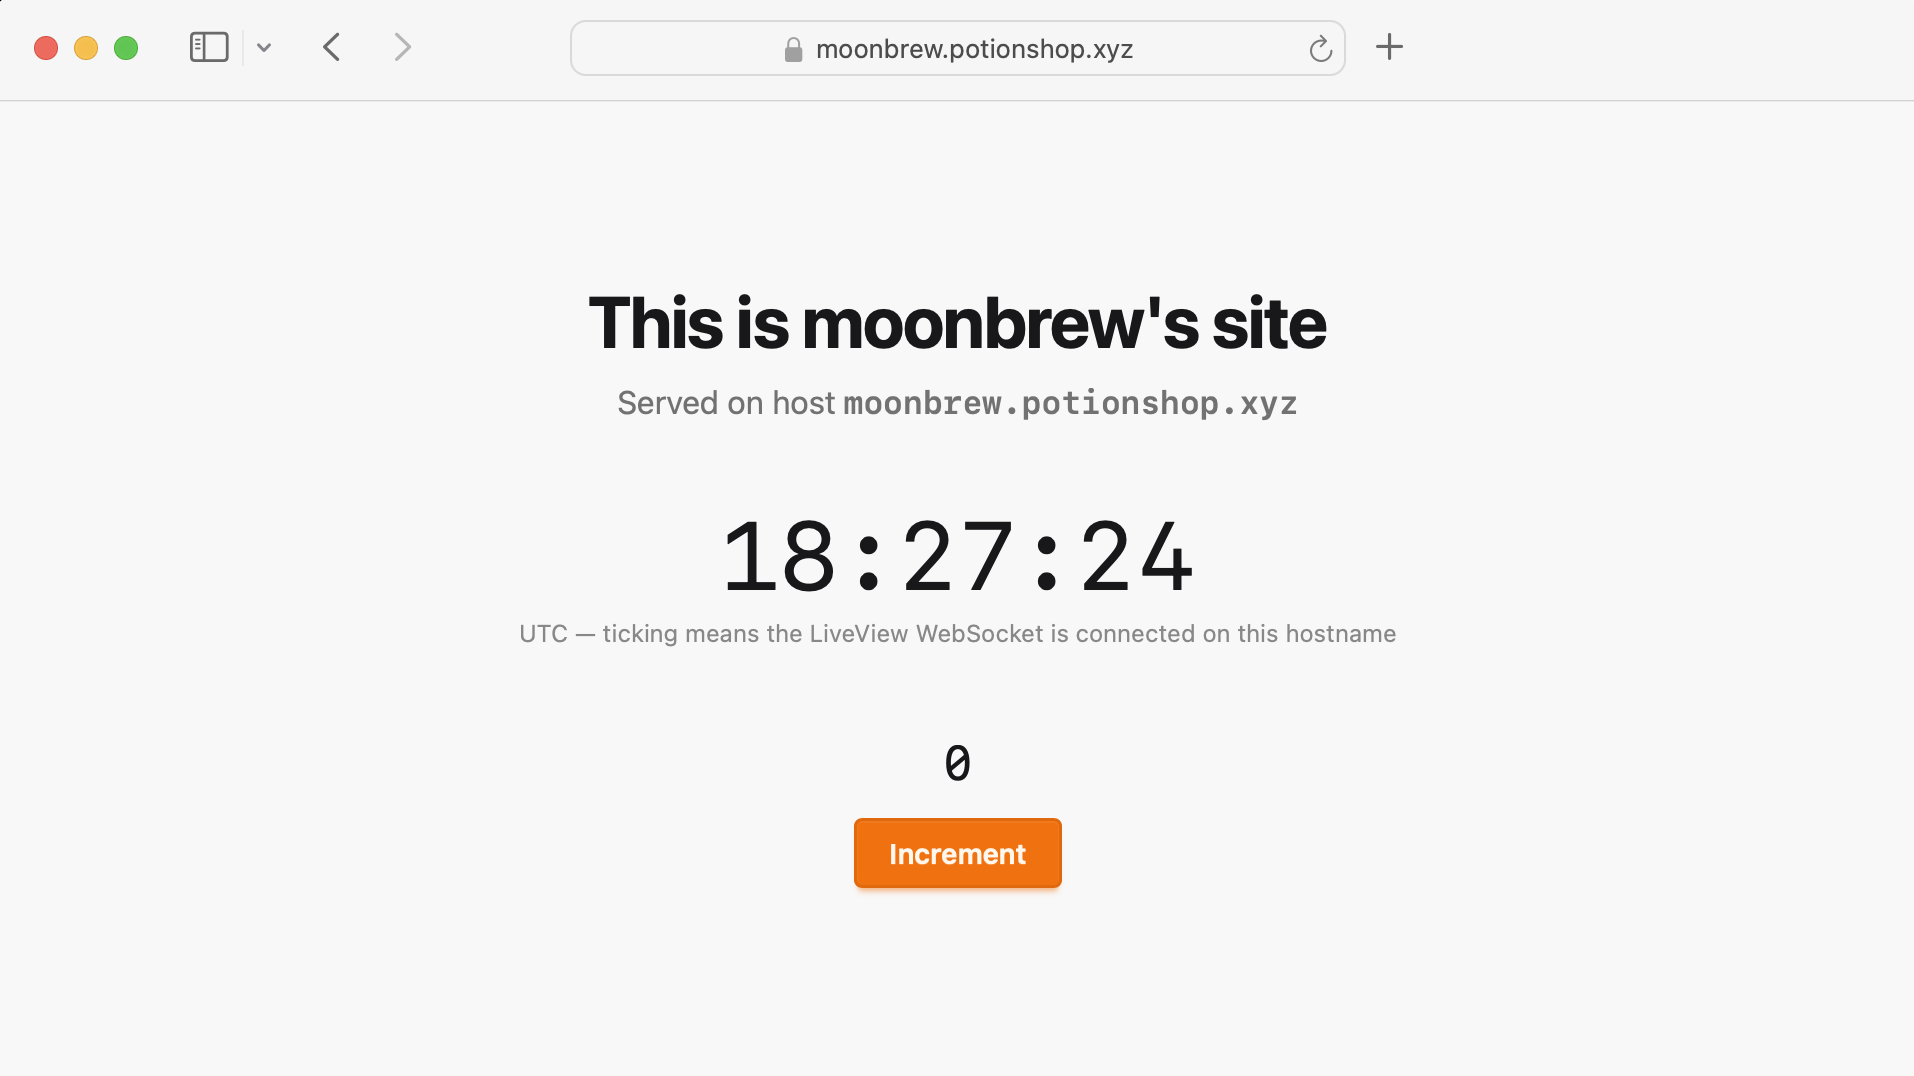
In my example app I created a site named "moonbrew" and the corresponding subdomain - moonbrew.potionshop.xyz - went live as soon as it was saved (screenshot below). There's no per-tenant issuance, no waiting on the first request, no certificate rate limits to worry about.
Bring your own domain
Subdomains are great, but what if your app offers a "connect your own domain" feature?
Just turn it on for your app. In the Multi-tenant mode card, click Enable tenant custom domains.
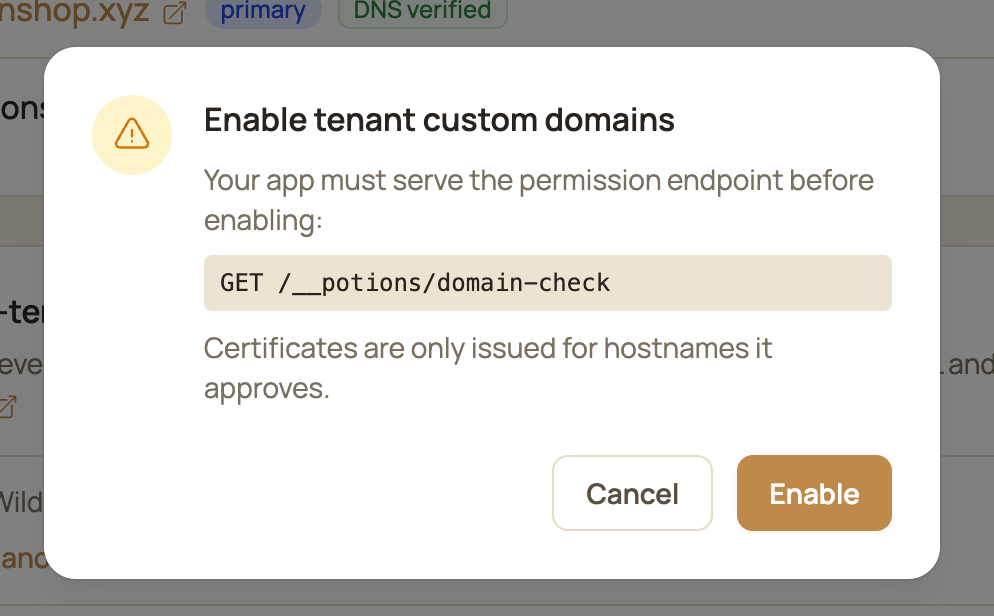
With it enabled, any hostname a tenant points at your server can get a certificate on demand.
How does it work? When a new hostname arrives, Caddy briefly pauses the connection and asks your app if it's a valid hostname.
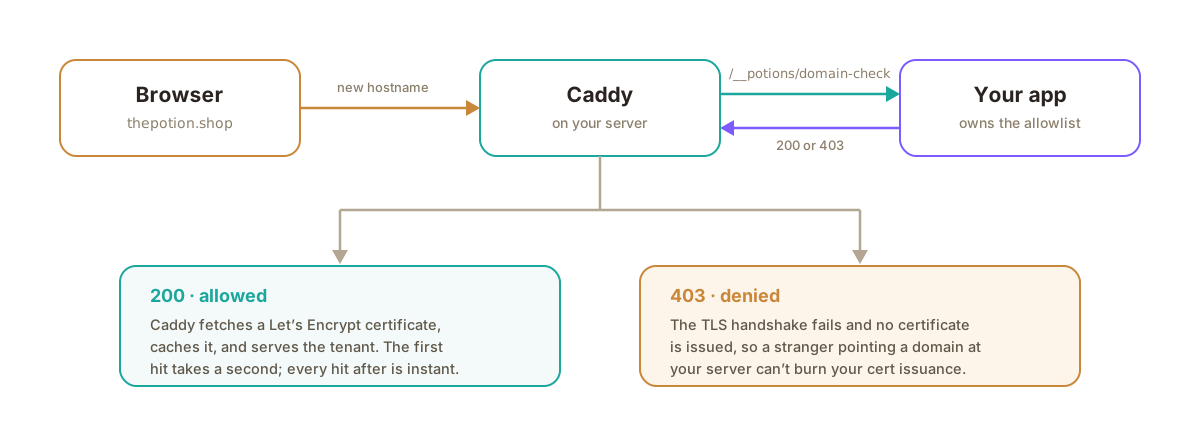
Your app then needs to respond to that question over a plain HTTP request that Caddy makes. For example, the first time someone visits thepotion.shop, the request looks like this:
GET /__potions/domain-check?domain=thepotion.shop
Your app should reply 200 to allow the hostname. For a hostname it doesn't recognize, reply 403 (any response other than 2xx denies it).
So in the multi_tenant_example app, a tenant adds a custom domain right from the admin page:
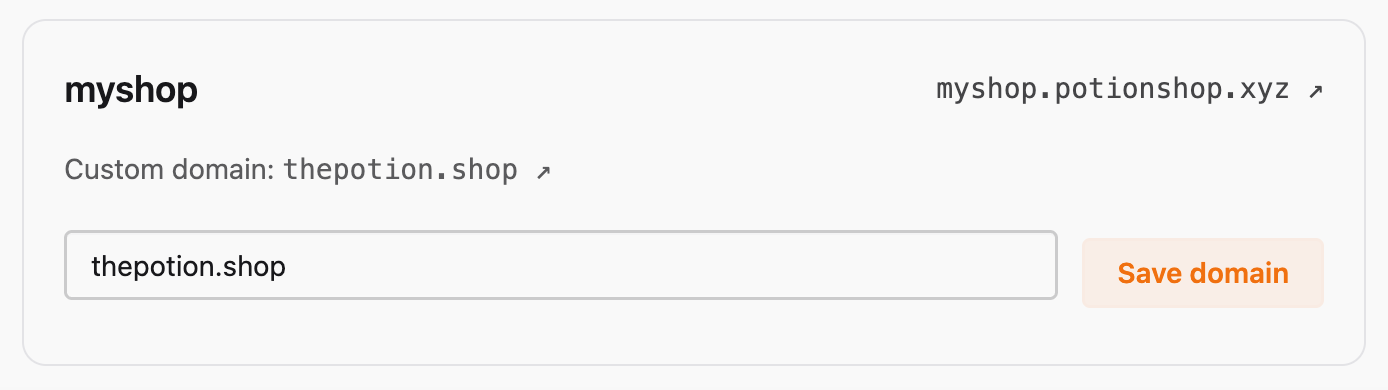
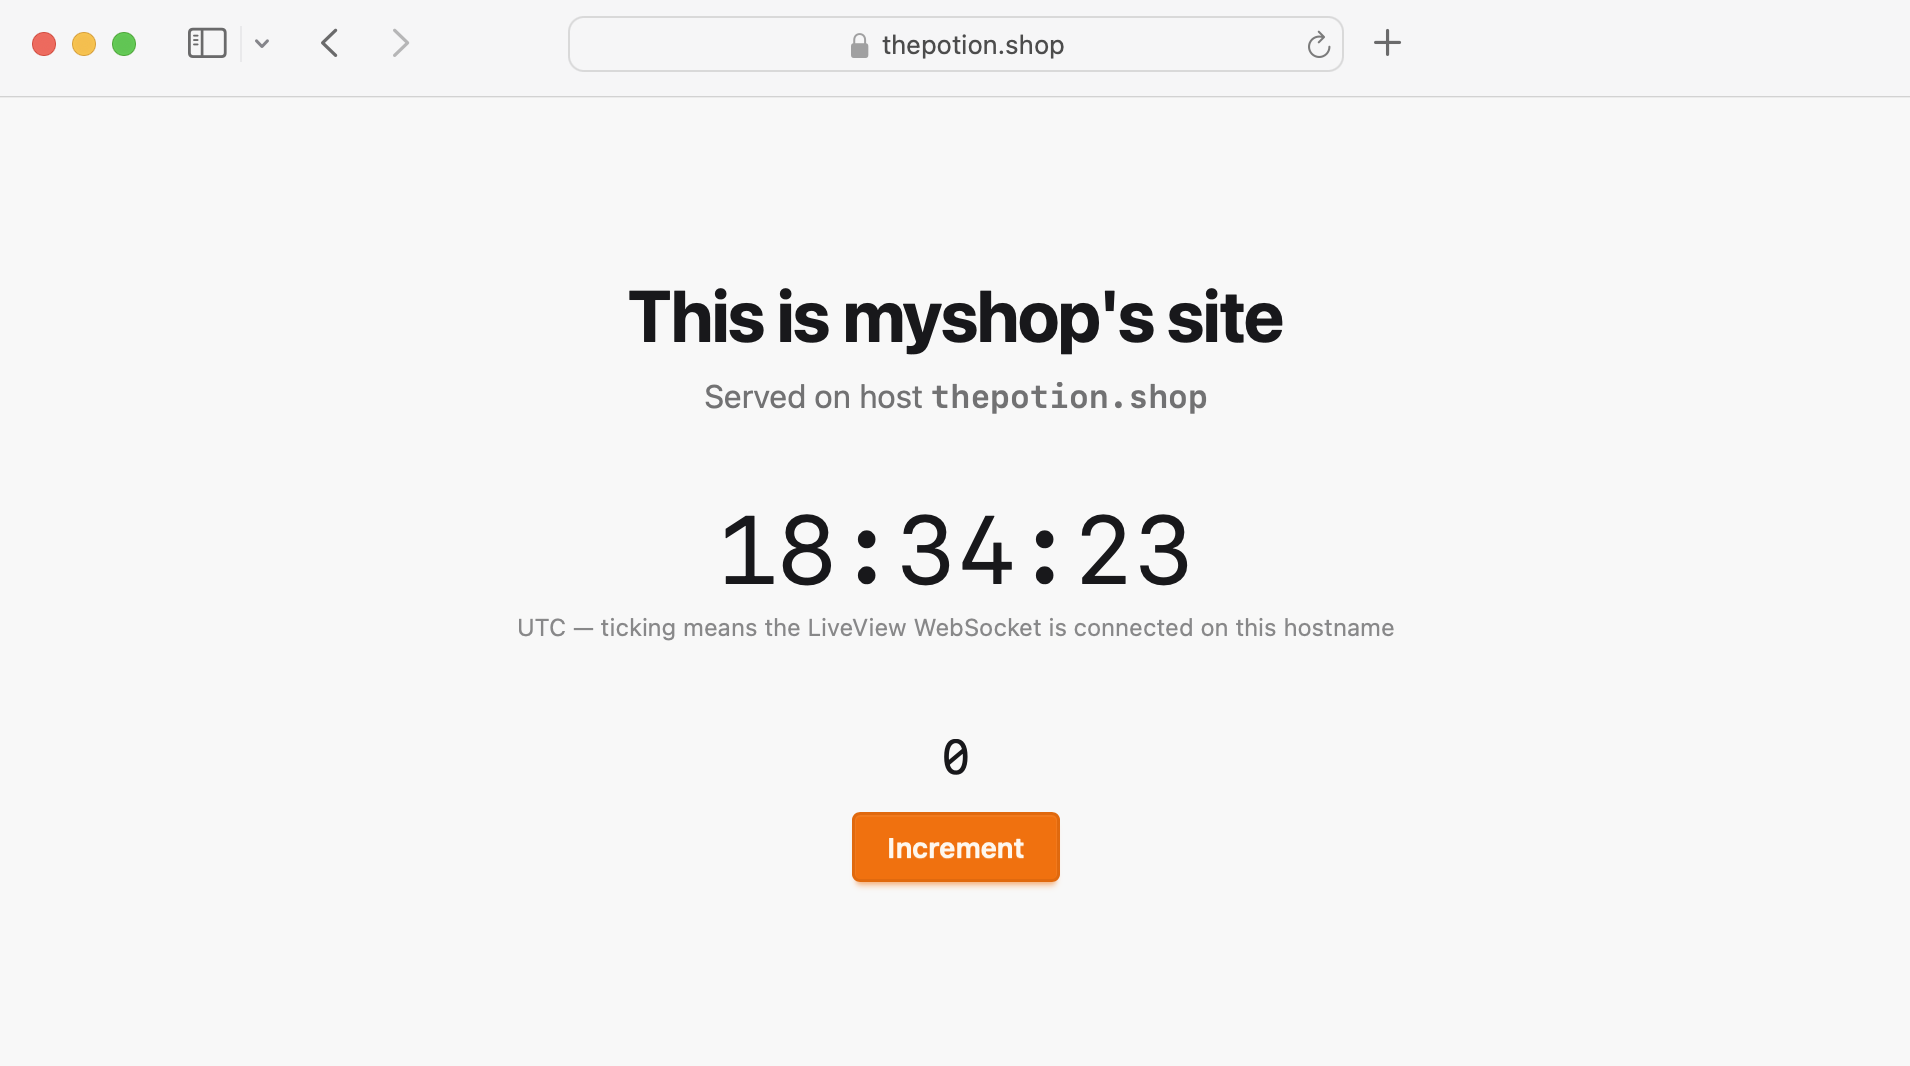
Then after the custom domain (thepotion.shop in this example) is pointed at the server's IP, the first HTTPS visit mints the certificate. A second later, the tenant's page is live on their own domain.
What your app has to do
If your app only needs tenant subdomains, there's no Potions-specific configuration needed. And if your app supports custom domains, you only need one endpoint. Here are the three integration steps (taken from the multi_tenant_example repo) that outline what your app needs.
- Tell Phoenix to accept WebSocket connections from any tenant host. Otherwise LiveView rejects connections on hostnames it doesn't recognize:
# config/runtime.exs
config :multi_tenant_example, MultiTenantExampleWeb.Endpoint,
check_origin: :conn-
Route by the request host, as any multi-tenant app will need to do. multi_tenant_example reads its base domain from a required
TENANT_BASE_DOMAINenvironment variable (in this example, we've set it topotionshop.xyz) and splitsmoonbrew.potionshop.xyzinto the tenantmoonbrewin a small plug. The essential pieces:
# config/runtime.exs
config :multi_tenant_example, :tenant_base_domain,
  System.fetch_env!("TENANT_BASE_DOMAIN")
# lib/multi_tenant_example_web/plugs/resolve_host.ex
def call(conn, _opts) do
base = Application.fetch_env!(:multi_tenant_example, :tenant_base_domain)
site =
cond do
conn.host == base ->
nil
String.ends_with?(conn.host, "." <> base) ->
conn.host
|> String.replace_suffix("." <> base, "")
|> Tenants.get_site_by_label()
true ->
Tenants.get_site_by_custom_domain(conn.host)
end
assign(conn, :site, site)
endA request for the base domain itself gets no site (that's your landing page), a subdomain looks the site up by its label, and anything else is treated as a custom domain. Unknown hostnames arrive with valid TLS too, so render a "no such site" page for them.
- (Custom domains only) Add a route to answer the domain-check:
# lib/multi_tenant_example_web/router.ex
scope "/", MultiTenantExampleWeb do
  pipe_through :api

  get "/__potions/domain-check", DomainCheckController, :check
end
And a controller that looks the hostname up:
# lib/multi_tenant_example_web/controllers/domain_check_controller.ex
def check(conn, %{"domain" => domain}) do
  domain = Tenants.normalize_host(domain)

  if Tenants.allowed_hostname?(domain) do
    send_plain(conn, 200, "ok")
  else
    send_plain(conn, 403, "denied")
  end
end
allowed_hostname?/1 is a single indexed lookup. Caddy only asks when it needs to issue or renew a certificate, not on every request. Still, keep it fast: the tenant's TLS handshake waits on the answer.
Under the hood
Potions takes care of a few things on your server so you never have to think about them:
-
Wildcards need the ACME DNS-01 challenge. Potions answers the challenge for you via the
_acme-challengeCNAME. - Custom-domain certificates use Caddy's on-demand TLS. This is gated by the domain-check endpoint shown above.
Good to know
- The first visit to a new custom domain takes about a second while its certificate is minted. Every visit after is full speed.
- Renewals are automatic.
- One multi-tenant app per server. On-demand TLS is a server-wide setting, so only one app on a server can run multi-tenant mode. Other apps on that server, and any custom domains they use, keep working alongside it.
Try it out
The full setup guide lives in the docs, and multi_tenant_example (the example app from this post) is on GitHub at github.com/potionsio/multi_tenant_example.
Happy deploying!
Deploy Phoenix on your own VPS
Potions gives you push-to-deploy, zero-downtime releases, and managed servers with the control of plain infrastructure.
Get started